Grass Wallet: Complete Guide to the New Built-in Crypto Wallet (2026)

Grass Wallet Guide 2026: Setup, Rewards, Staking & MoonPay
Grass Wallet is the newest member of the suite that offers each of its users a crypto wallet integrated into the Dashboard. While classic crypto wallets demand an additional installation and configuration process, it is generated for each of the accounts automatically, which helps even beginners to use the Grass Network.
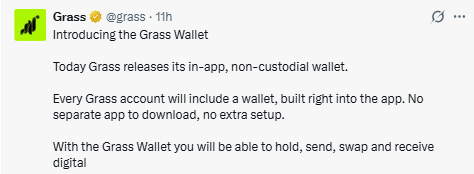
Source: Official Grass X Post
What is Grass Wallet
It is a custodian-less and integrated cryptocurrency built right into the Grass app. Unlike the necessity of using any such as MetaMask in order to participate, users are automatically assigned it once they have logged into their account.
How to Get Started
Step 1: Creation of an Account or Signing in
Go to the official dashboard and sign up for an account if you do not already have one. Carry out any necessary verification processes like email verification.
Step 2: In-Built Set-Up
When you log into your account, it automatically generates your account for you. There is no need for any browser extensions or additional software.
Step 3: Accessing
To access your address, token balance, rewards, and digital assets, go to the tab on the Dashboard.
Step 4: Receiving Rewards
These might be Points, token distribution, and others from the ecosystem.
The eligibility of rewards depends upon the campaigns being run on the platform at the moment.
Step 5: Enjoy Rewards
Reward eligibility is deposited straight in. As your wallet is already connected to your account, you don’t need any other and can view your balance in the dashboard.
Step 6: Managing Your Assets
-
Having collected your assets, you can now put them to use in the following manner:
-
Holding Tokens: Store your tokens securely in anticipation of developments in the ecosystem.
-
Staking Tokens: Stake your tokens so as to participate in various network activities and earn staking rewards.
-
Swapping Tokens: Swap your eligible cryptocurrency tokens through it without the need for external exchanges.
-
The functions available to you will depend on the assets available in it.
Step 7: Sending and Receiving Cryptocurrency
-
It is made possible for you to send and receive digital currency through it.
-
Sending Crypto: Enter the address of the recipient, enter the amount, review the transaction and then confirm the transaction. Make sure that the address entered is correct before sending any funds.
-
Receiving Crypto: Copy your address and share it with the sender. The moment your transaction gets confirmed on the blockchain network, funds will be deposited into it.
Step 8: Purchase and Withdrawal of Cryptocurrency
In case you are from a region where it is offered, you can make a purchase or withdrawal of cryptocurrencies via MoonPay.
Steps to Get in
Getting into it is an easy process because it comes in built-in your Grass account.
Step 1: Access the Official Dashboard
Use the official Grass dashboard on your browser.
Step 2: Login to Your Account
Login to the account using your Grass account credentials. For new users who are logging into it for the first time, you have to sign up and get verified first.
Step 3: Access the Wallet
Navigate to the tab from the dashboard. Here you will see that your wallet is auto-created for you; therefore, there is nothing much for you to do.
Step 4: View
On the screen, you will see the address, token balance, reward history, and supported cryptocurrencies.
Step 5: Prepare for Managing Cryptocurrency
Here, you can use it to conduct activities like cryptocurrency transfers, swapping of supported tokens, staking of eligible assets, and management of rewards.
How Grass Is Different From Other Crypto Wallets (MetaMask)
| Feature | Grass Wallet | Other Crypto Wallets (MetaMask, Phantom, Trust Wallet) |
|---|---|---|
| Creating a Wallet | Automatically created when you create an account. | Requires downloading, installing, and manually creating a wallet. |
| Setup Process | No browser extension or mobile app installation required. | Requires installing a browser extension or mobile application. |
| Backup Method | Supports Passkey (Face ID/Fingerprint) or email OTP, with optional private key/seed phrase export. | Requires securely storing a recovery seed phrase during initial setup. |
| Integration | Built directly into the Dashboard for seamless access. | Runs as a separate wallet application that connects to websites. |
| Primary Purpose | Optimized for rewards, staking, and ecosystem participation. | General-purpose Web3 wallet for DeFi, NFTs, and decentralized applications. |
| Rewards | Eligible rewards can be deposited directly into the wallet. | Most rewards must be manually claimed or transferred from external platforms. |
| Funding Options | Includes MoonPay integration for buying and withdrawing supported cryptocurrencies (where available). | Funding options depend on the wallet and third-party payment providers. |
Benefits
Novice-Friendly: No need for an additional installation.
Unified System: A combination of the dashboard and wallet in one platform.
Automatic Wallet Generation: Automatic generation for each qualifying account.
Immediate Rewards Crediting: Automatic credit of qualifying rewards.
Cryptocurrency Features: Sending, receiving, exchanging, holding, and staking digital currencies.
Funding Capability: MoonPay integration allows for funding/withdrawal in certain geographic regions.
Security measures that are emphasized
-
It is generated automatically within the official application.
-
Access your Grass only via the official Dashboard.
-
This assures us that they will never ask for your seed phrase or private keys.
-
Do not entertain direct messages offering support or rewards.
Conclusion
It significantly reduces the difficulty of using the platform by eliminating most of the common obstacles that come with crypto. It features automatic creation, seamless integration with the Dashboard, and the ability to send and receive funds, stake, swap, and distribute rewards, among others.
YMYL Disclaimer: This article is intended for informational purposes only and is based on publicly available information and statements reported by third-party sources. Always do your own research through official sources before making any investment decision.
Also read: